The Project Goal:
We have a need to provision a logical database server in Microsoft Azure and then creating one or more brand new Azure SQL Databases. We also need to migrate one or more on-premises databases to this logical server.
Pre-requisites:
- Any valid Azure subscription.
- PowerShell 5.1+
- Latest Azure PowerShell Module (Install-Module -Name Az)
- Latest SSMS
- SQLPackages.exe
PowerShell Script explanation:
Note the value of SubscriptionID and TenantID from the Azure Portal; this information is required to login non-interactively.
Alternatively, you can login to the Azure Cloud interactively and then collect the SubscriptionID and TenantID in-advance with the following code:
# To get Subscription and Tenant ID
Clear-Host

Connect-AzAccount

$tenantID       = (Get-AzContext).Tenant.id
$subscriptionID = (Get-AzContext).Subscription.id

"TenantID = $tenantID"
"SubscriptionID = $subscriptionID"
Steps to follow:
- Login to the Azure cloud.
- Create a new resource group.
- Create a logical SQL Server.
- Open the Firewall to allow specific IP to the logical database server.
- Create one or more new databases.
- Migrate one or more on-premises databases using SQLPackage.exe to the newly created logical server.
PowerShell Script:
################################################
# Step 1: Connect to the Azure cloud
################################################
$azUser = "myemail@hotdog.com"
$azPassword = ConvertTo-SecureString -String "OpenPass404" -AsPlainText -Force
$tenantID = "953c78eb-391d-6c0b-a35f-7224d135267"
$subscriptionID = "f961f3ad-79f9-471e-aba7-3f92b8458c0b"

$Credential = New-Object -TypeName "System.Management.Automation.PSCredential" -ArgumentList $azUser,$azPassword
Connect-AzAccount -Credential $Credential -Tenant $tenantID -Subscription $subscriptionID


################################################
# Step 2: Create a resource group
################################################
$rgName ="shb-azure-rg-01"
$location = "eastus" # $location = "East US"
New-AzResourceGroup -Name $rgName -Location $location


################################################
# Step 3: Create a logical Azure SQL Server
################################################
$serverName         ="shb-az-db-01"
$sqlAdmin           = "sqladmin"
$sqlPassword        = "Winter2020"
$sqlPasswordSecure  =  $(ConvertTo-SecureString -String $sqlPassword -AsPlainText -Force)
$SqlAdminCredential = $(New-Object -TypeName System.Management.Automation.PSCredential -ArgumentList $sqlAdmin, $sqlPasswordSecure )

$newServer = New-AzSqlServer -ResourceGroupName $rgName `
    -Location $location `
    -ServerName $serverName `
    -SqlAdministratorCredentials $SqlAdminCredential


################################################
# Step 4: Open Azure server firewall to allow access
# Replace the public IP addresses bellow
################################################
$newStartIP = $((Invoke-RestMethod http://ipinfo.io/json).ip)
$newEndIP   = $((Invoke-RestMethod http://ipinfo.io/json).ip)

$newFirewallRule = New-AzSqlServerFirewallRule -ResourceGroupName $rgName `
    -ServerName $serverName `
    -FirewallRuleName "Allow_Public_IP" -StartIpAddress $newStartIP -EndIpAddress $newEndIP


################################################
# Step 5: Create a new database by specifying a service tier
# Get-AzSqlServerServiceObjective -Location $location
################################################
$databaseName = "ProductDB"
$newDatabase = New-AzSqlDatabase  -ResourceGroupName $rgName `
    -ServerName $serverName `
    -DatabaseName $databaseName `
    -RequestedServiceObjectiveName "Basic"


################################################
# Step 6: Migrate on-premises dataabse to Azure SQL
################################################

# Environment variable for SQLPackage
$EnvPath = $Env:Path
IF (-not $EnvPath.Contains( "C:\Program Files\Microsoft SQL Server\150\DAC\bin")) {
    Write-Host "SQLPackage.exe is not in the environment variables path"
    $Env:Path = $Env:Path + ";C:\Program Files\Microsoft SQL Server\150\DAC\bin;"
}

# database to backup
$databaseToAzure = 'WorkForceDB'

# bacpac file name for the backup
$fileName = $databaseToAzure + "_full"

# backup to a local folder
# or to a local temporay folder
$folderName = $env:temp

#target filename with location
$targetFilePath = "$folderName\$fileName-$(get-date -f yyyyMMdd-hhmmtt).bacpac"

# export the database to the local folder
SqlPackage.exe /Action:Export /scs:"Server=SHBMAIN\SQL2019;Database=$databaseToAzure;Trusted_Connection=True;" /tf:$targetFilePath

# import the database in Azure SQL Database
sqlpackage.exe /Action:Import /tsn:tcp:$serverName.database.windows.net,1433 /tdn:$databaseToAzure /tu:$sqlAdmin /tp:$sqlPassword /sf:$targetFilePath /p:Storage=File

# Change the pricing tier
Set-AzSqlDatabase -ServerName $serverName -ResourceGroupName $rgName `
        -DatabaseName $databaseToAzure -RequestedServiceObjectiveName "Basic"

################################################
# Step 6: Use SSMS to connect to the Azure SQL
################################################
PowerShell Script Execution:
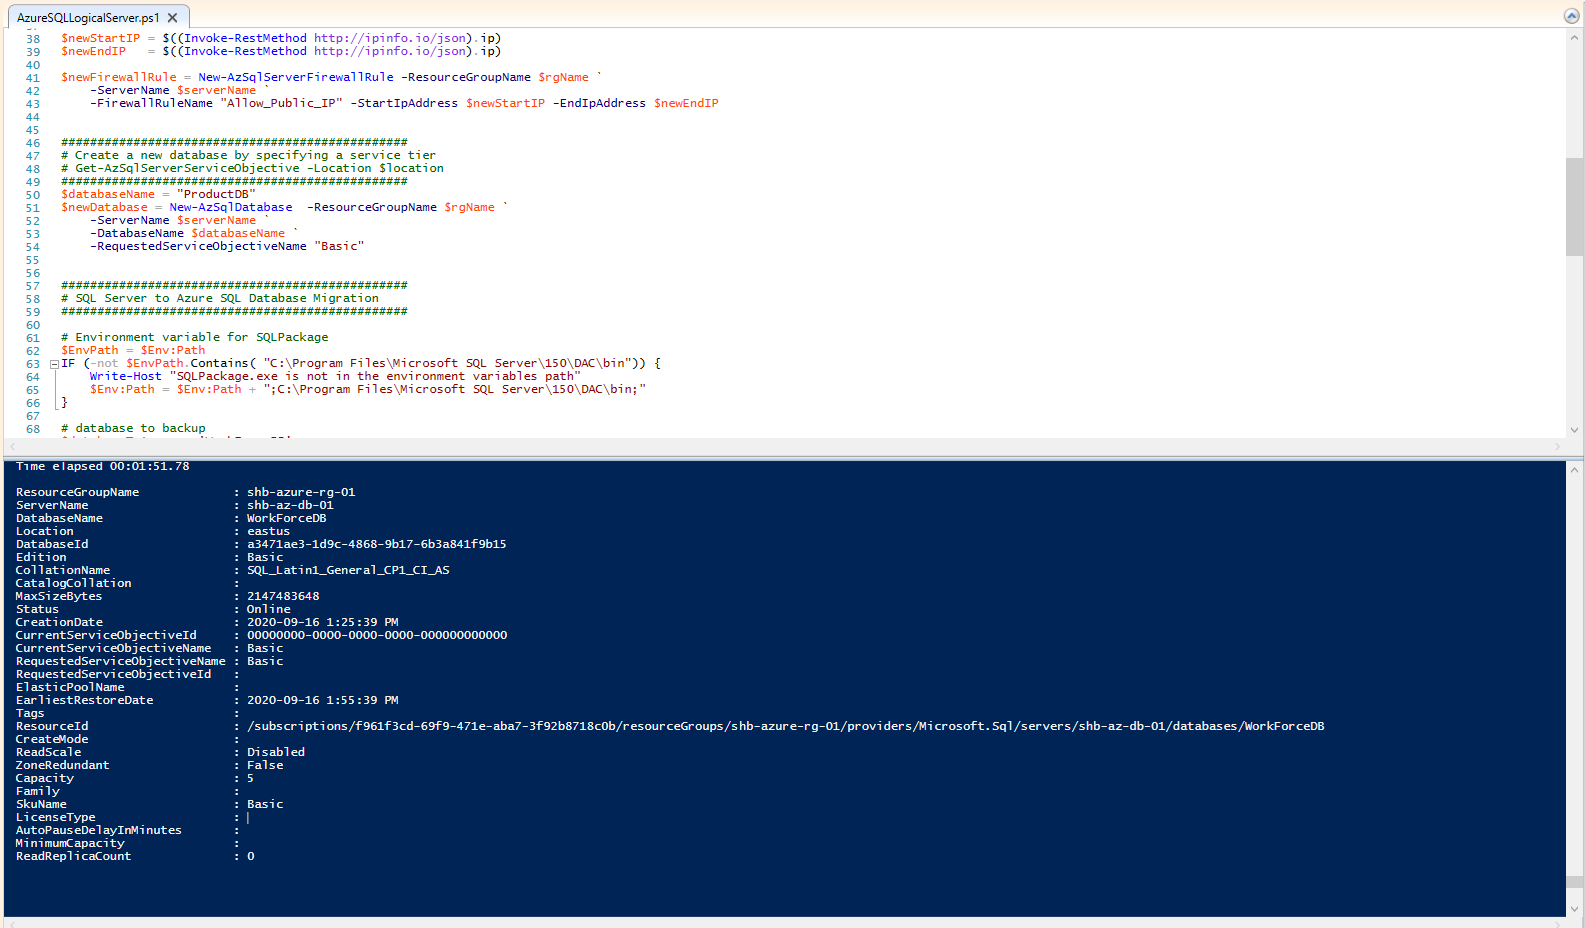 New Resource has been created:

Opening Public IP in Firewall for the Logical Server:  Connecting to the Logical Server using SSMS:
References:
Use PowerShell to create a single database and configure a server-level firewall rule
https://docs.microsoft.com/en-us/azure/azure-sql/database/scripts/create-and-configure-database-powershell?toc=/powershell/module/toc.json
No comments:
Post a Comment