MSA
is a Managed Active Directory Account which is automatically managed by the
Active Directory (AD). A MSA (domain\account$)
is assigned to a Windows Server and the password management is handled by the Windows.
Benefits of MSA: The
main benefit of Managed Service Account (MSA) is that the password management
is delegated to the Active Directory and Windows Operating System, and thus the
MSA reduces the overhead of administrative tasks on service account and simplify
service principal’s management in an enterprise.
- Automatic password
management.
- Simplified service principal
name (SPN) management.
- Cannot be used to
interactively log into Windows.
- Easily control which
computers are authorized authenticate MSAs and run code in their context.
There are two types of
Managed Service Account (MSA):
1. sMSA (Standalone Manage
Service Account): This type of managed service account (MSA) was introduced in
Windows Server 2008 R2 and Windows 7. A sMSA can be used to a single Windows
Server.
2. gMSA (Group Managed Service
Account): This type of managed service account (MSA) was introduced in Windows
Server 2012 R2. The gMSA can be used multiple times. Failover clusters do not
support gMSA. However, services that run on top of the Cluster service can use
a gMSA or a sMSA if they are a Windows service, an App pool, a scheduled task,
or natively support gMSA or sMSA.
sMSA and gMSA support for
SQL Server:
- SQL Server 2012: This
edition of SQL Server supports only sMSA.
- SQL Server 2014 and up: sMSA
and gMSA both are supported
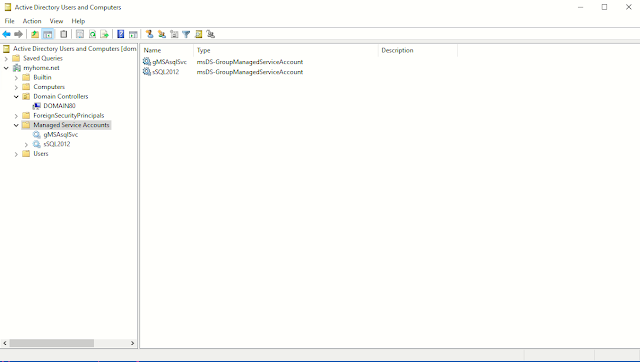 |
MSA account on the AD
|
Standalone Managed Service
Accounts (sMSA) Prerequisites for SQL Server: To use a sMSA following
prerequisites needs to be met:
- Domain Functional Level of Windows
Server 2008 R2 or above.
- SQL Server 2012 or above.
- Microsoft Key Distribution
Service.
- Active Directory PowerShell
module for management.
Group Managed Service
Accounts (gMSA) Prerequisites for SQL Server: To use a gMSA following
prerequisites needs to be met:
- Domain Functional Level of Windows
Server 2012 or higher.
- SQL Server 2014 or above.
- Window Server 2012 R2 or
above.
- Microsoft Key Distribution
Service.
- Active Directory PowerShell
module for management.
Steps to create MSA (sMSA or gMSA):
- Create the KDS key on the domain
controller.
- Install Active Directory
PowerShell Module.
- Create sMSA or gMSA.
- On the client, install the
sSMA or gMSA.
- Configure the Windows
Service with the MSA.
Step-by-Step to create a
Standalone Managed Service Account (sMSA): We
need to create a Standalone Managed Service Account, say sSQL2012 to use with a
SQL Server 2012 which is installed on Windows Server named sql2019 in
myhome.net domain.
On The domain controller: Perform the following on the domain controller:
- Check KDS key: if the KDS
key is not available then we need to create one. Note that a 10 hours is
required to be effective of a KDS key.
Add-KdsRootKey -EffectiveTime ((get-date).addhours(-10))
- Create service account named
sSQL2012:
New-ADServiceAccount sSQL2012 `
-DisplayName
"sql2012 MSA Service" `
-DNSHostName
sql2019.myhome.net
- Set which server can retrieve the password
from the Active Directory:
Set-ADServiceAccount sSQL2012 `
-PrincipalsAllowedToRetrieveManagedPassword
sql2019$
- Set the encryption type for the account:
Set-ADServiceAccount `
-Identity sSQL2012 `
-KerberosEncryptionType
AES128,AES256
On the Client Server (server: SQL2019): Logon
to the client server, in our example the server name is SQL2019 and then
execute the following commands:
- Install and import the
Active Directory PowerShell Module.
Add-WindowsFeature RSAT-AD-PowerShell
Import-Module ActiveDirectory
- Install the newly created
Managed Service Account sSQL2012:
Install-ADServiceAccount -Identity sSQL2012
- Test and validate the
account:
Test-ADServiceAccount -Identity sSQL2012
If everything went well, then the testing result
will be as follows:
- Now open the SQL Server
Configuration Manager and then change the service account. In my case, the new
service account is myhome\sSQL2012$.
Step-by-Step to create a Group
Managed Service Account (gMSA): We
need to create a Group Managed Service Account, say gMSAsqlSvc to use with multiple
SQL Server instances starting with edition SQL 2014. Let’s assume that the
Windows Servers are Sql2104, Sql2016, sql2017 and sql2019. All these Windows
server resides in myhome.net domain.
A gMSA
creation can be done in two different ways, using AD Group Account or without using an AD
Group.
Creating gMSA Using AD
Group: On The domain controller:
- Check KDS key: if the KDS
key is not available then we need to create one. Note that a 10 hours is
required to be effective of a KDS key.
Add-KdsRootKey -EffectiveTime ((get-date).addhours(-10))
- Create an AD Group as
SQLSvcGroup:
New-ADGroup "SQLSvcGroup" `
-GroupCategory
Security `
-GroupScope
Global `
-PassThru `
–Verbose
- Add two servers to the newly
created AD Group. Make sure you have added $ at the of each computer name:
Add-AdGroupMember `
-Identity "SQLSvcGroup" `
-Members sql2014$, sql2016$
- Verify the SQLSvcSvr Group:
Get-AdGroupMember -Identity "SQLSvcGroup"
- Create a group service
account as gMSAsqlSvc:
New-ADServiceAccount `
-Name gMSAsqlSvc `
-PrincipalsAllowedToRetrieveManagedPassword
SQLSvcGroup `
-Enabled:$true `
-DNSHostName
gMSAsqlSvc.myhome.net `
-SamAccountName
gMSAsqlSvc `
-ManagedPasswordIntervalInDays
30
Creating gMSA Without AD
Group: On The domain controller:
- Check KDS key: if the KDS
key is not available then we need to create one. Note that a 10 hours is
required to be effective of a KDS key.
Add-KdsRootKey -EffectiveTime ((get-date).addhours(-10))
- Craete a group service
account as gMSAsqlSvc, include the two servers:
New-ADServiceAccount -Name gMSAsqlSvc
`
-DNSHostName
gMSAsqlSvc.myhome.net `
-PrincipalsAllowedToRetrieveManagedPassword
sql2014$,sql2016$ `
-ManagedPasswordIntervalInDays
30
- If you need to add more
server to the group service account then, use the following command for each
server which needs to be added to managed service account:
Add-ADComputerServiceAccount `
-ServiceAccount
gMSAsqlSvc `
-Computer sql2019
Set-ADServiceAccount `
-Identity gMSAsqlSvc `
-PrincipalsAllowedToRetrieveManagedPassword
sql2019$
On the Client Server (Server name: SQL2014, SQL2016): Logon
to the client server, in our example the server name is SQL2014 and then
execute the following commands:
- Install and import the
Active Directory PowerShell Module.
Add-WindowsFeature RSAT-AD-PowerShell Import-Module ActiveDirectory
- Install the newly created
Managed Service Account sSQL2012:
Install-ADServiceAccount -Identity gMSAsqlSvc
- Test and validate the
account:
Test-ADServiceAccount -Identity gMSAsqlSvc
If everything went well, then the testing result
will be as follows:
- Now open the SQL Server
Configuration Manager and then change the service account. In my case, the new
service account is myhome\gMSAsqlSvc$.
Using a MSA: To
use a sMSA or gMSA account with SQL Server Service, navigate “SQL Server
Configuration Manager” and then use DOMAIN\<msa name>$. Please note that the MSA needs a $ at the end. We don’t need to provide the password for MSA,
Windows will automatically retrieve the password from the AD.
References:


